


Replace your Laptop’s DVD Drive with an HDD or SSD
Well, most of the laptops do have DVD Drive or a CD drive especially the older ones have it. At this age of the internet, most of us don’t really use these optical drives nowadays. Now the laptop manufacturers are abandoning the Optical drive on the new releases. So this article is based on How to Replace your laptop’s DVD Drive with an HDD or SSD.
Suppose you upgraded from HDD to your new SSD, the SSD might have less storage capacity compared to HDD. Since SDD is expensive you likely to be choosing 256 or 512 GB SSD. And you should be looking for how to get additional disk space. So if you have a DVD drive you can use that port to add a new HDD by using a caddy, maybe a new SSD as well. Or you just need to upgrade to more storage options you can use this.
Do note that not every laptop will run SSD. And not every laptop has a bootable second bus. Which means not all laptops can boot your HDD from your DVD driver port.
How To Replace your Laptop’s DVD Drive with an HDD or SSD
Things you need
- Caddy (Die-cast aluminium caddy is recommended or plastic caddy is okay) You can get one from Amazon for less than 10$.
- A screwdriver
- An Internal HDD or SSD for replacement
Before starting if you are planning to use SSD or a larger capacity drive as the secondary using a caddy, we recommend you to use it as the main primary drive and use the other disk as the secondary drive
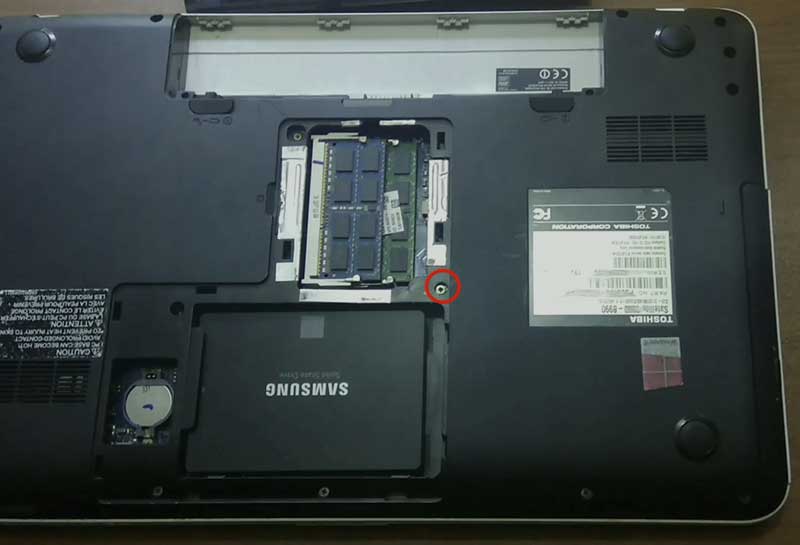
STEP 1: Remove your DVD drive
The first step is to remove the DVD drive from the laptop. In order to do it. first, turn off the laptop, remove the battery, flip the laptop and remove the bottom cover to have access to the screw that holds the optical drive in place. Then remove the screw.

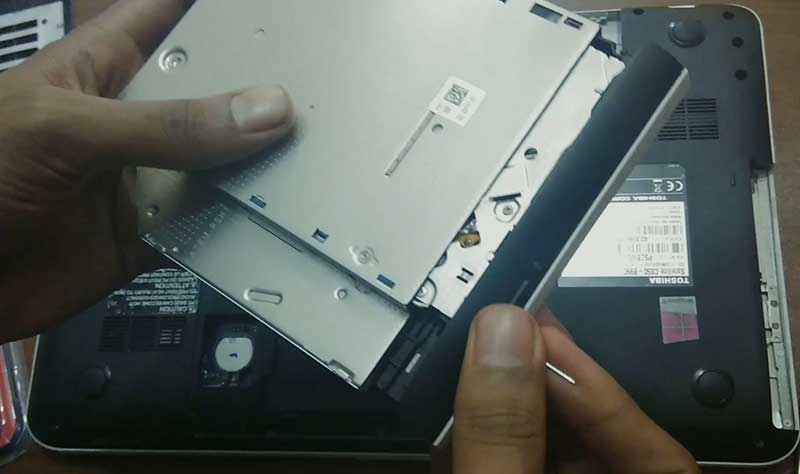
Use a pin to unlock the DVD drive.

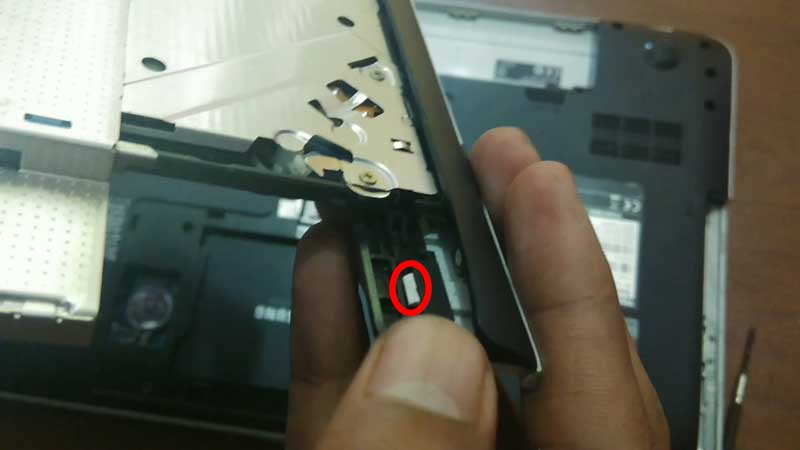
STEP 2: Remove the faceplate
Use a screwdriver or plastic knife to gently remove the faceplate.


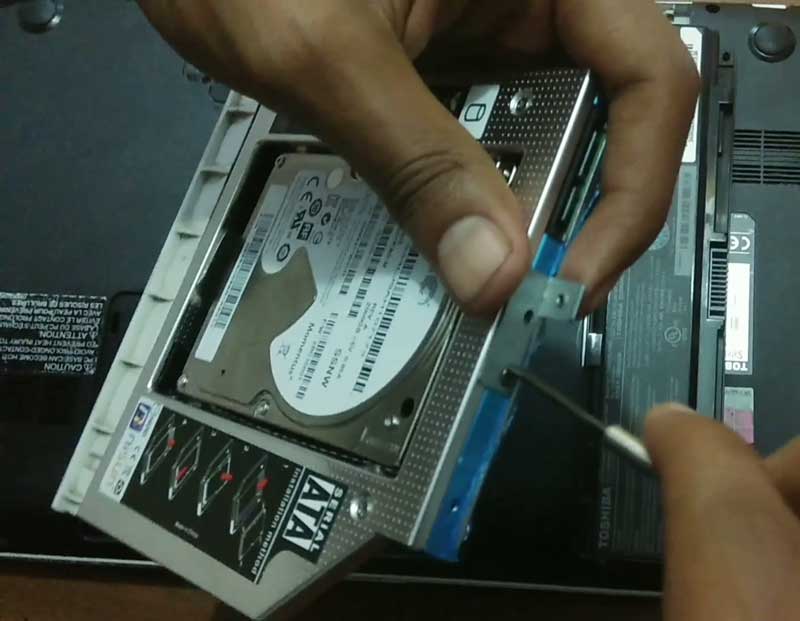
STEP 3: Insert hard drive or SSD into the drive caddy


STEP 4: Remove the metal bracket and attach it to the caddy
Remove the small metal bracket attached at the back of your DVD drive and attach it to the caddy.

Now make sure to tighten all the screws (not too tight).

STEP 5: Attach the optical drive faceplate to caddy
Now attach the optical drive faceplate to the drive caddy. The tabs will snap into place and attach to the drive caddy easily.
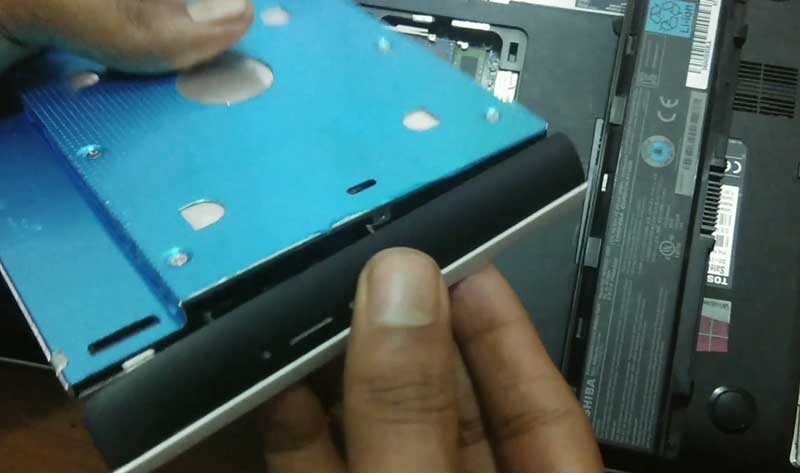

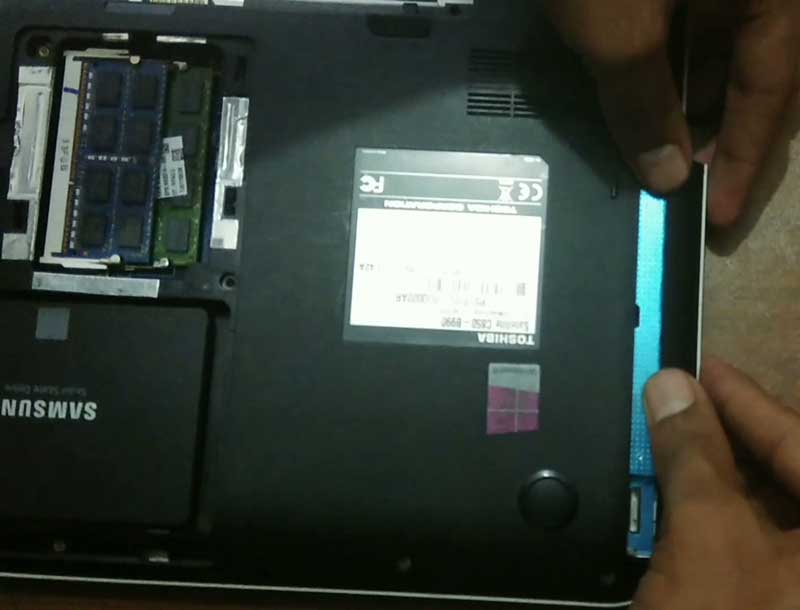
STEP 6: Insert drive caddy into the DVD drive bay
Insert drive caddy into the DVD drive bay and Re-attach screw to secure drive caddy to the laptop.

That’s it.
This is how you can replace your Laptop’s DVD drive with a secondary HDD or SSD.
For the more tech news and reviews, follow Insanertech.com on Twitter, Facebook, Instagram.


